Prerequisites
- A Meilisearch Cloud account. Sign up at cloud.meilisearch.com if you do not have one.
Step 1: Click “New project”
From the Cloud dashboard, click the New project button.
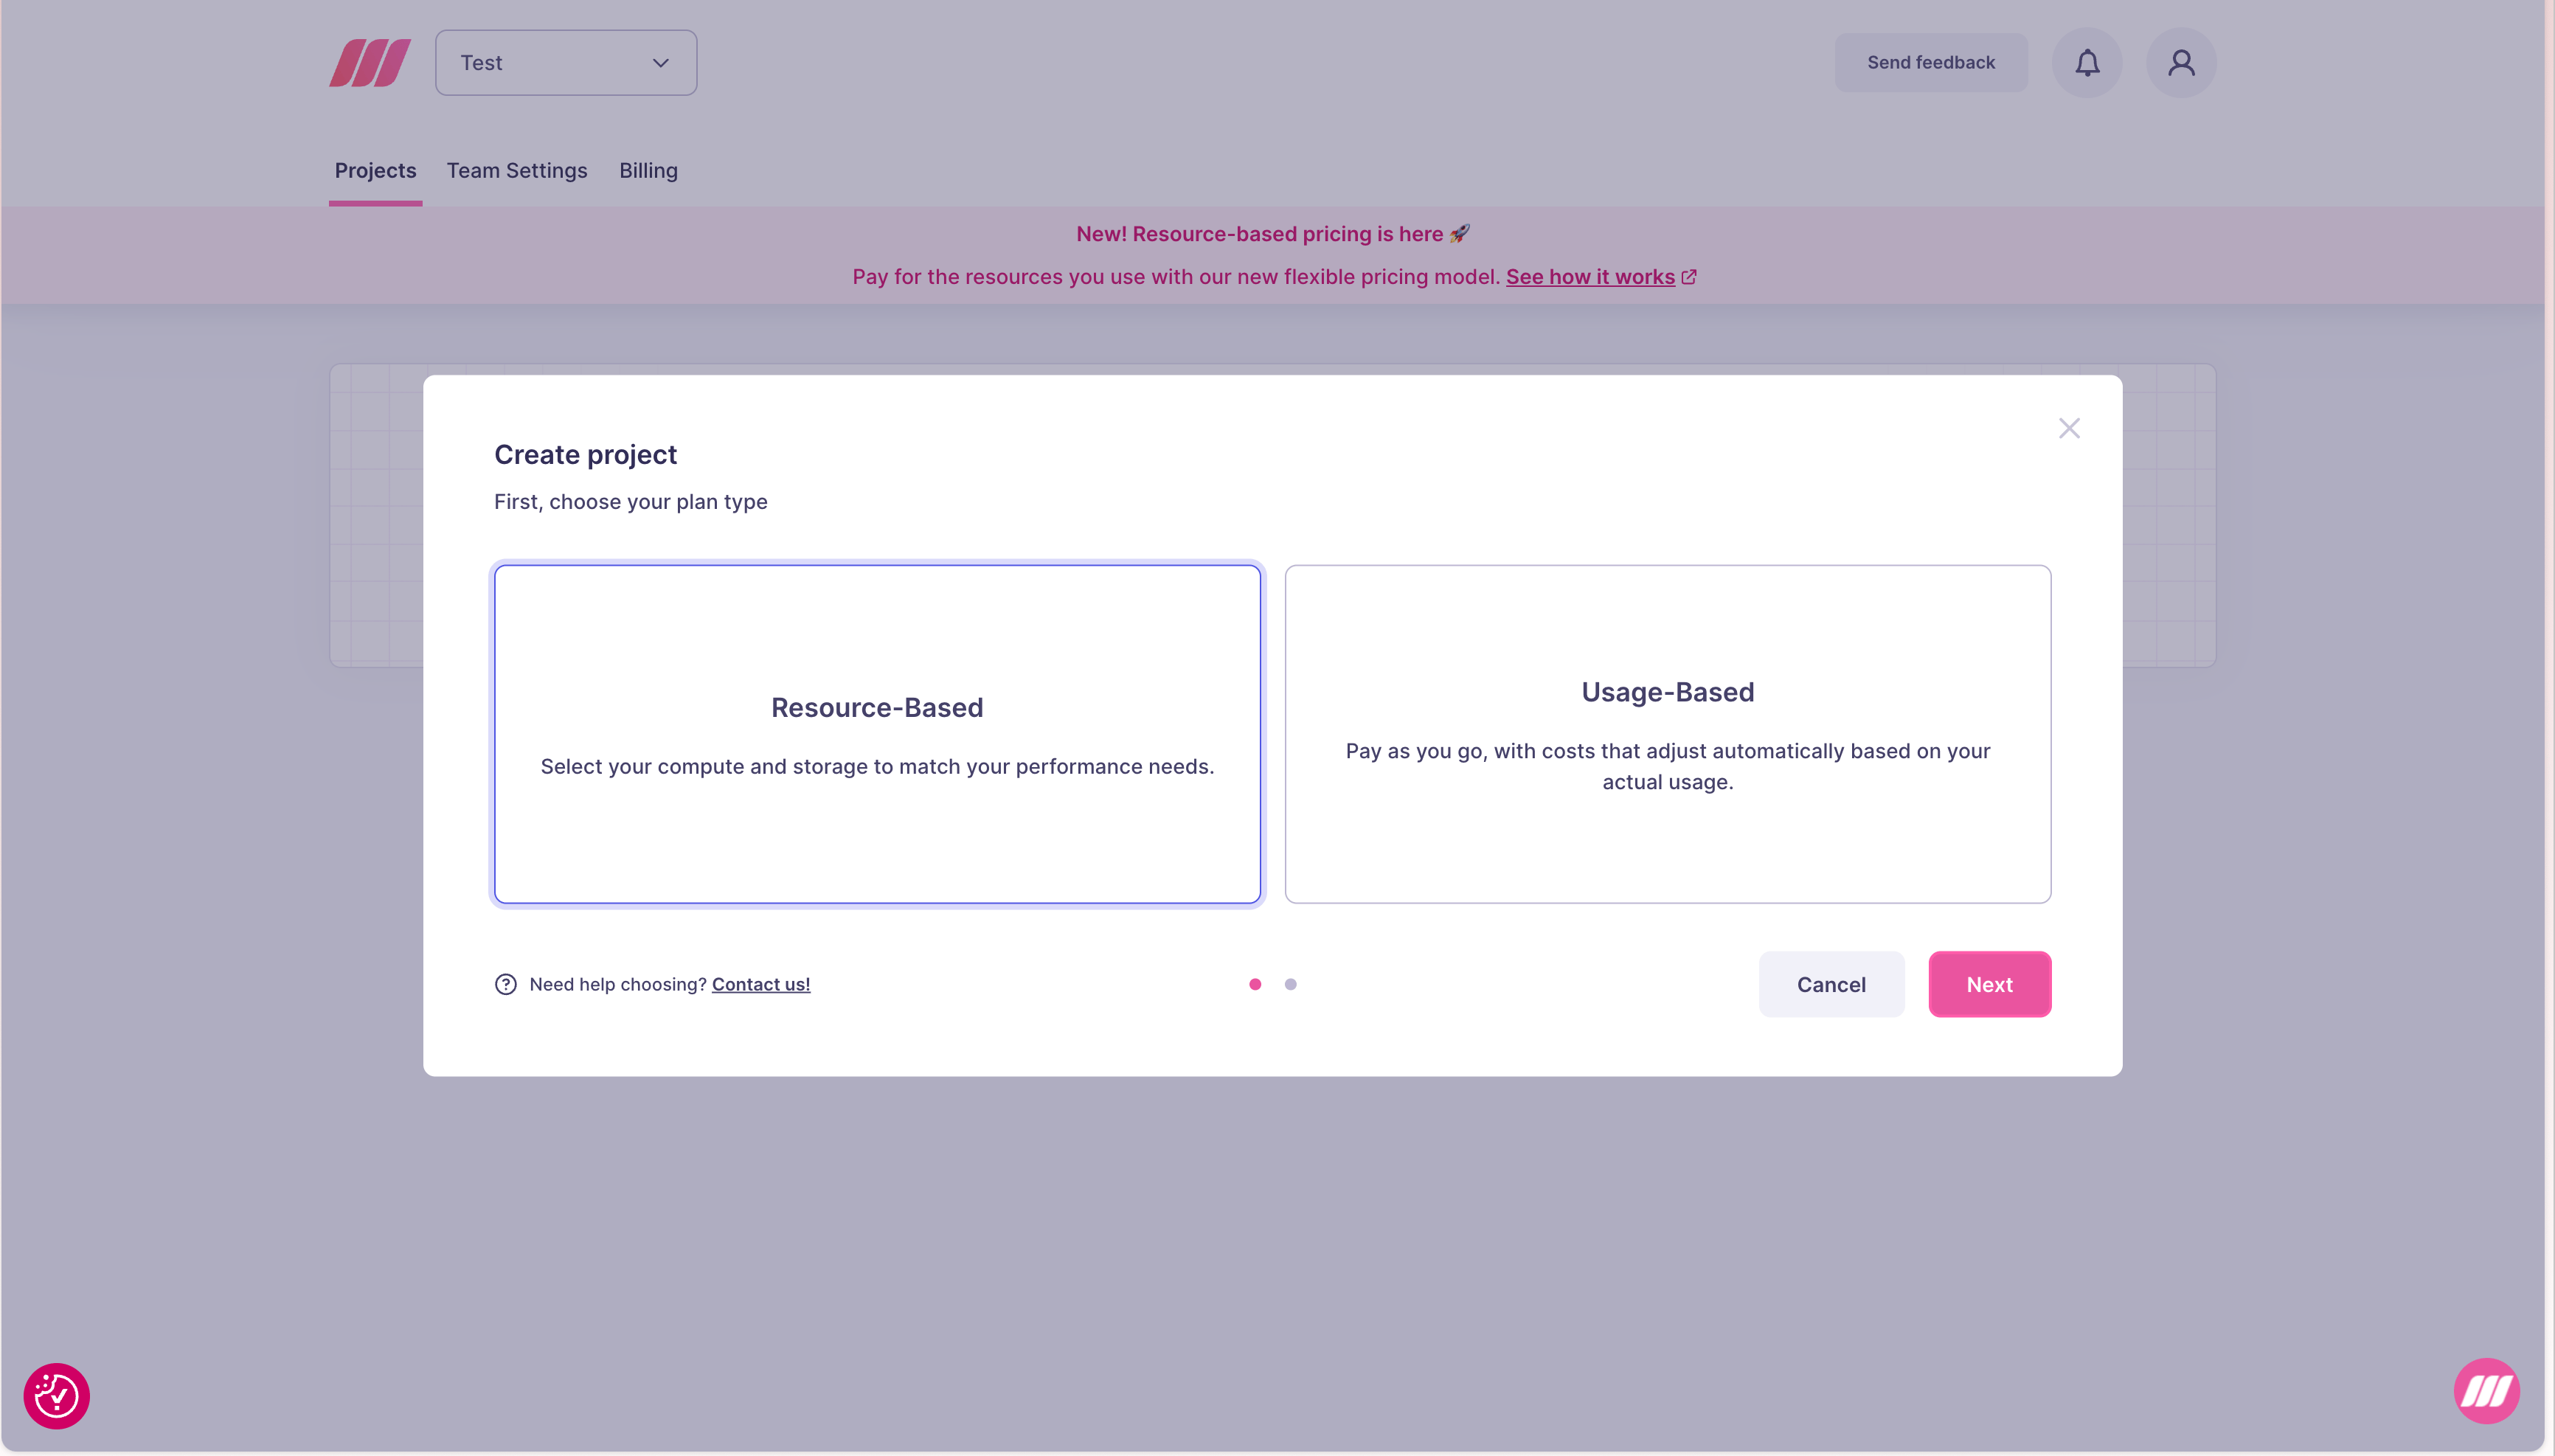
Step 2: Choose a plan type
You will be asked to choose between two billing models:
See Resource-based vs usage-based for guidance on which to choose.
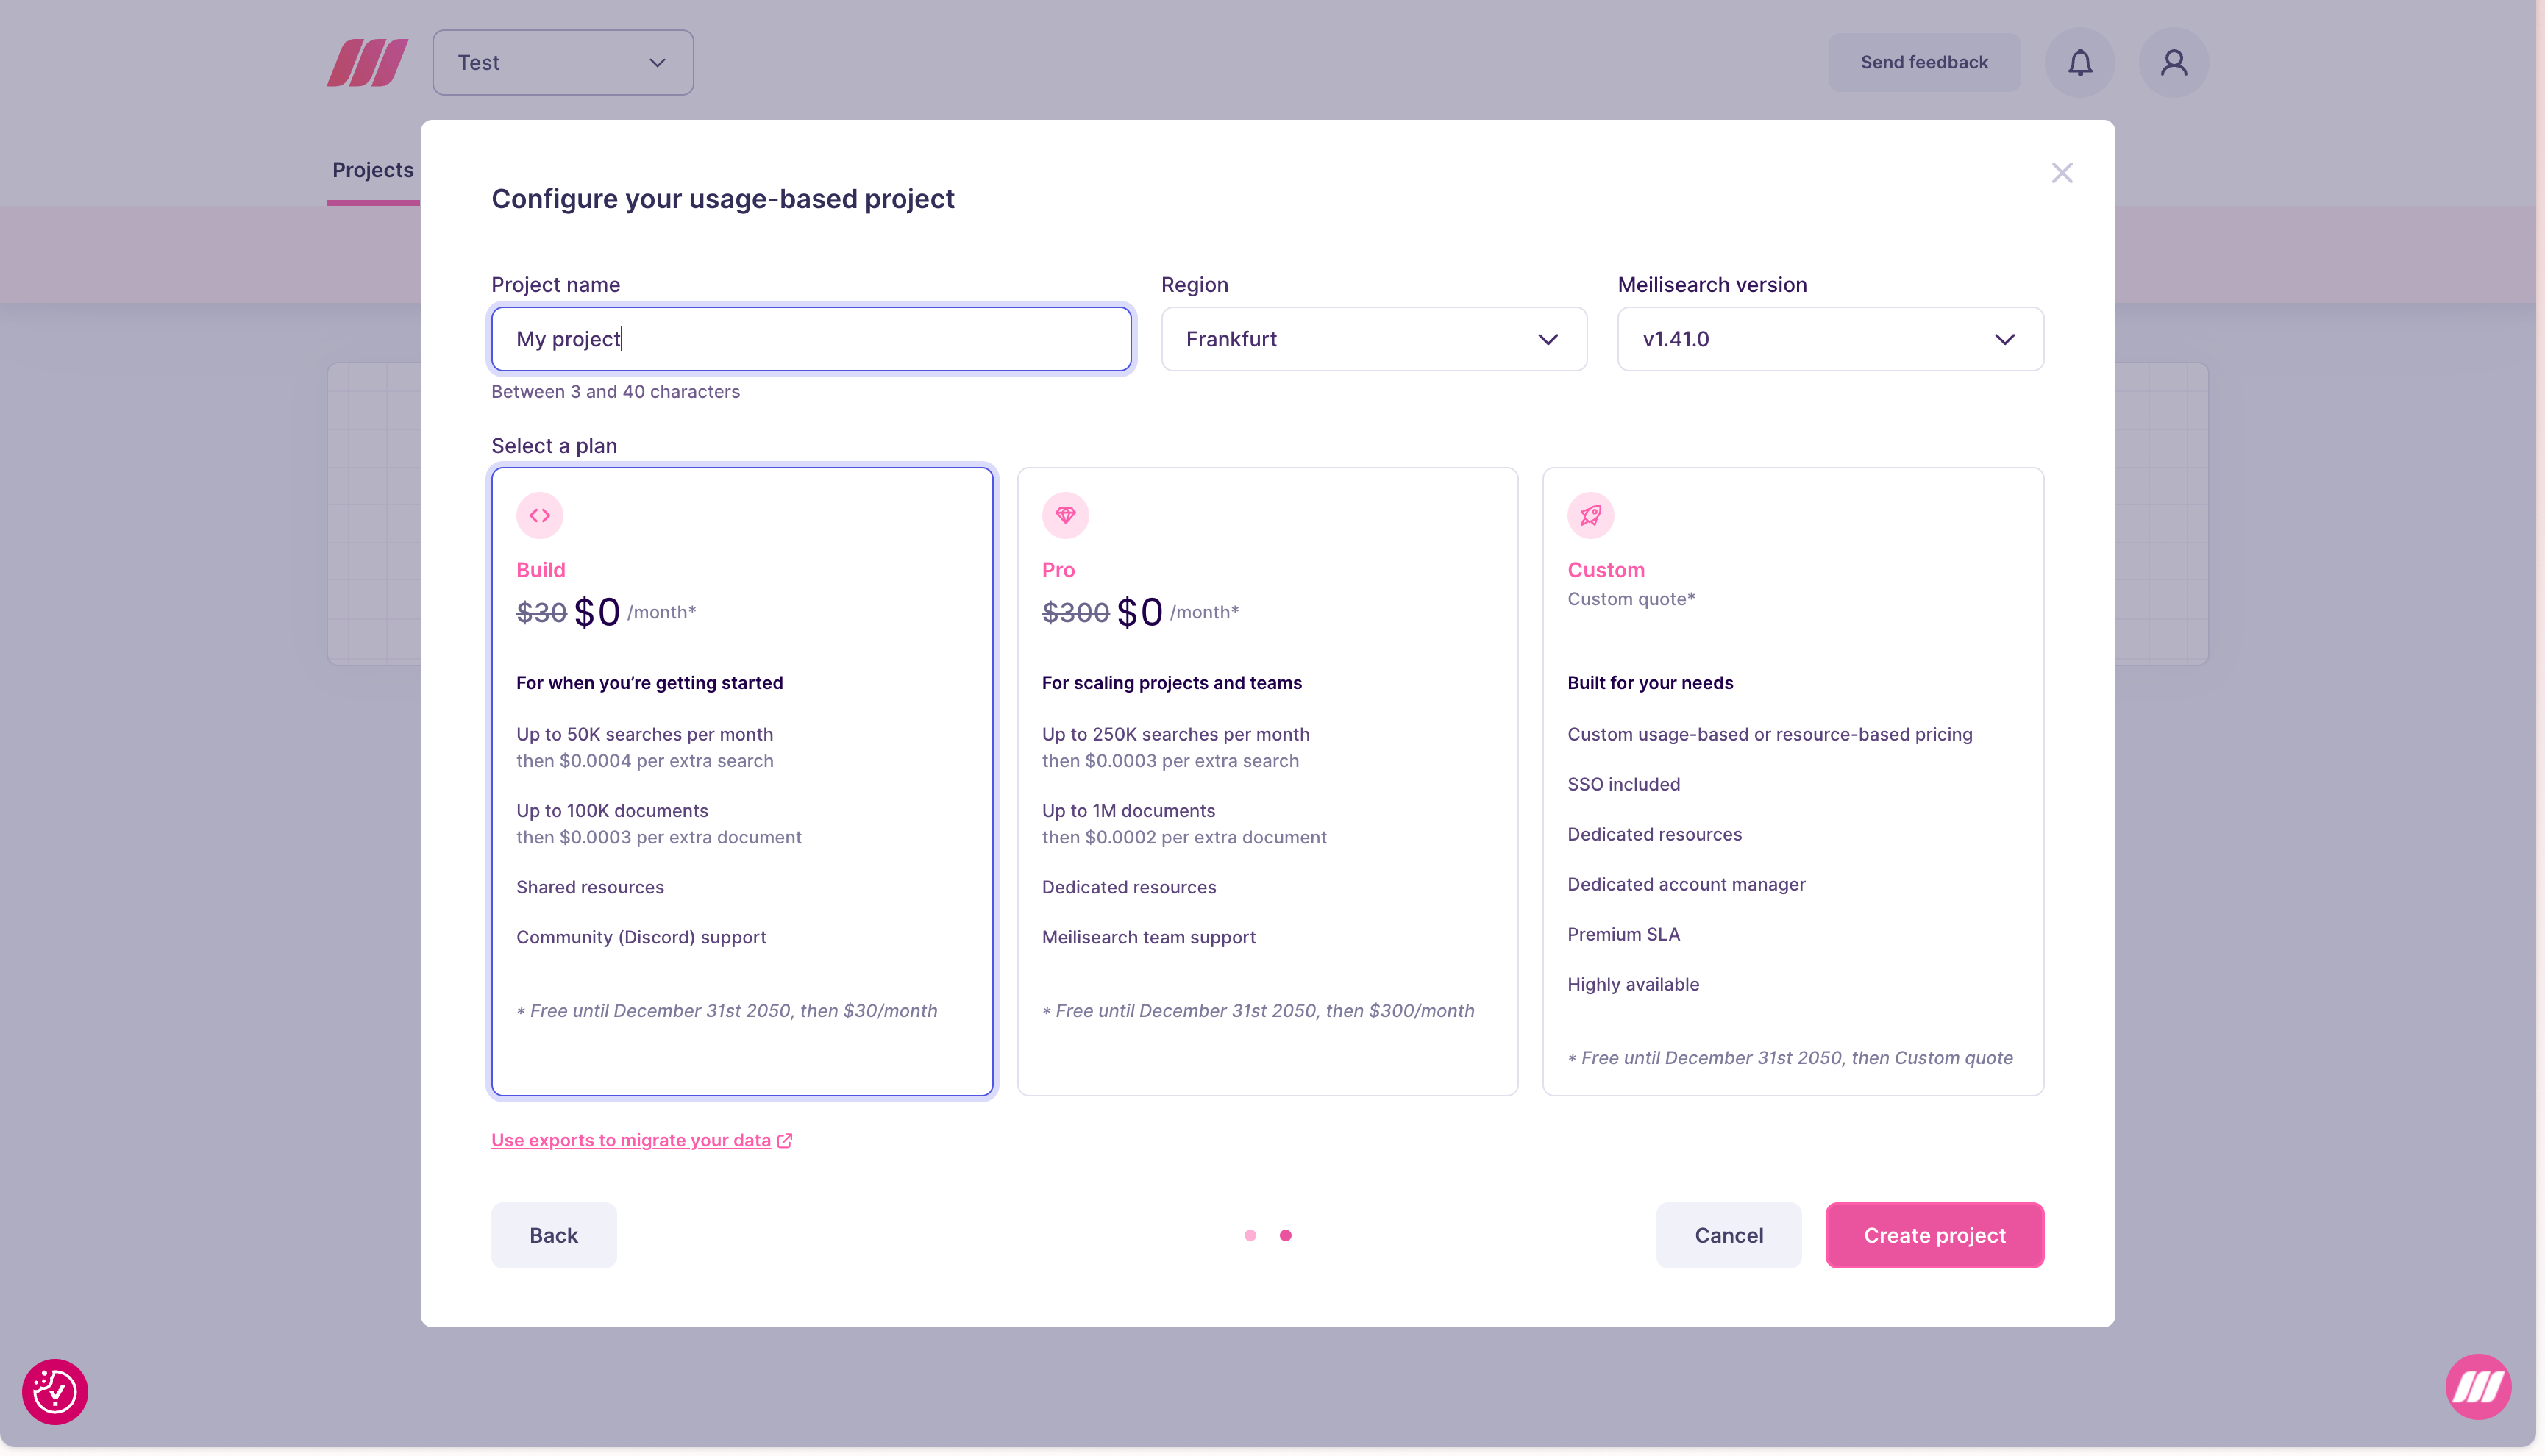
Step 3: Configure the project
Both plan types share three common fields:Resource-Based configuration
Select a resource tier (Memory and vCPU). The Cloud UI shows the hourly cost and estimated monthly cost for the selected tier. Resource-based projects include Meilisearch team support. See resource-based pricing for more details.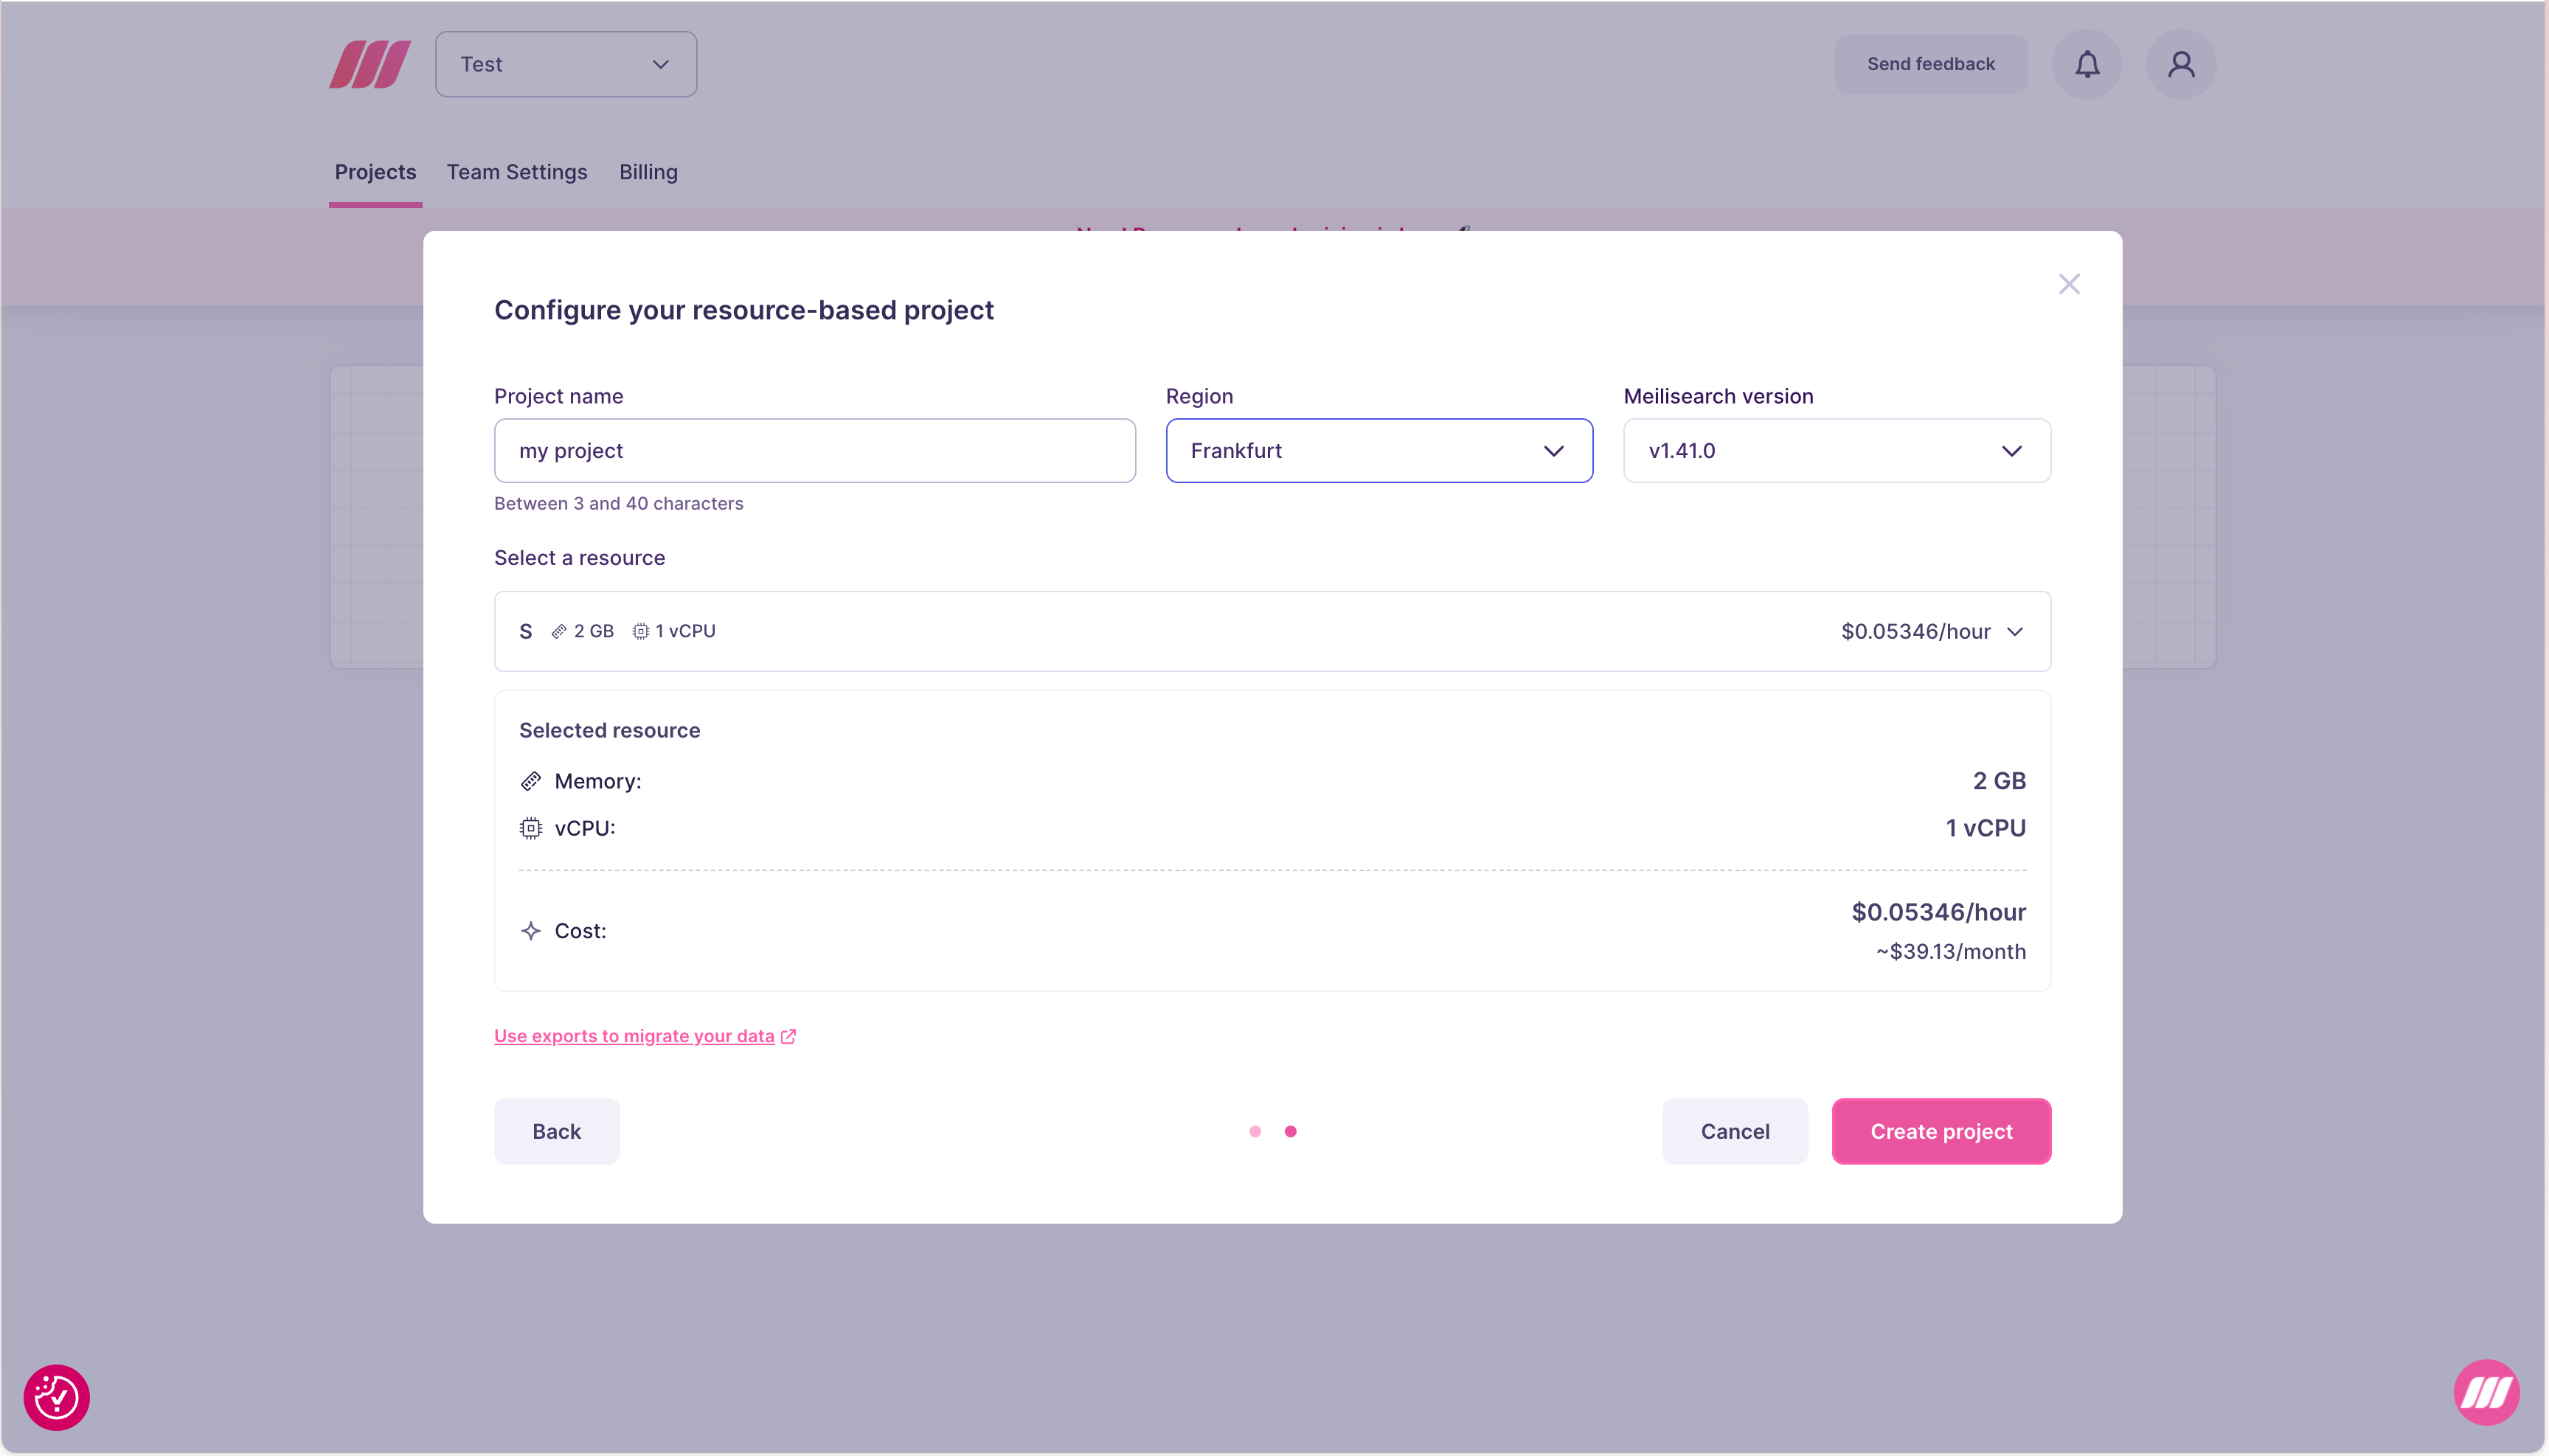
Usage-Based configuration
Select a plan:
See usage-based pricing for more details.
Step 4: Create the project
Click Create project. Meilisearch Cloud provisions the instance. The project appears in your dashboard with a creating status while it is being provisioned, then becomes available in a few seconds.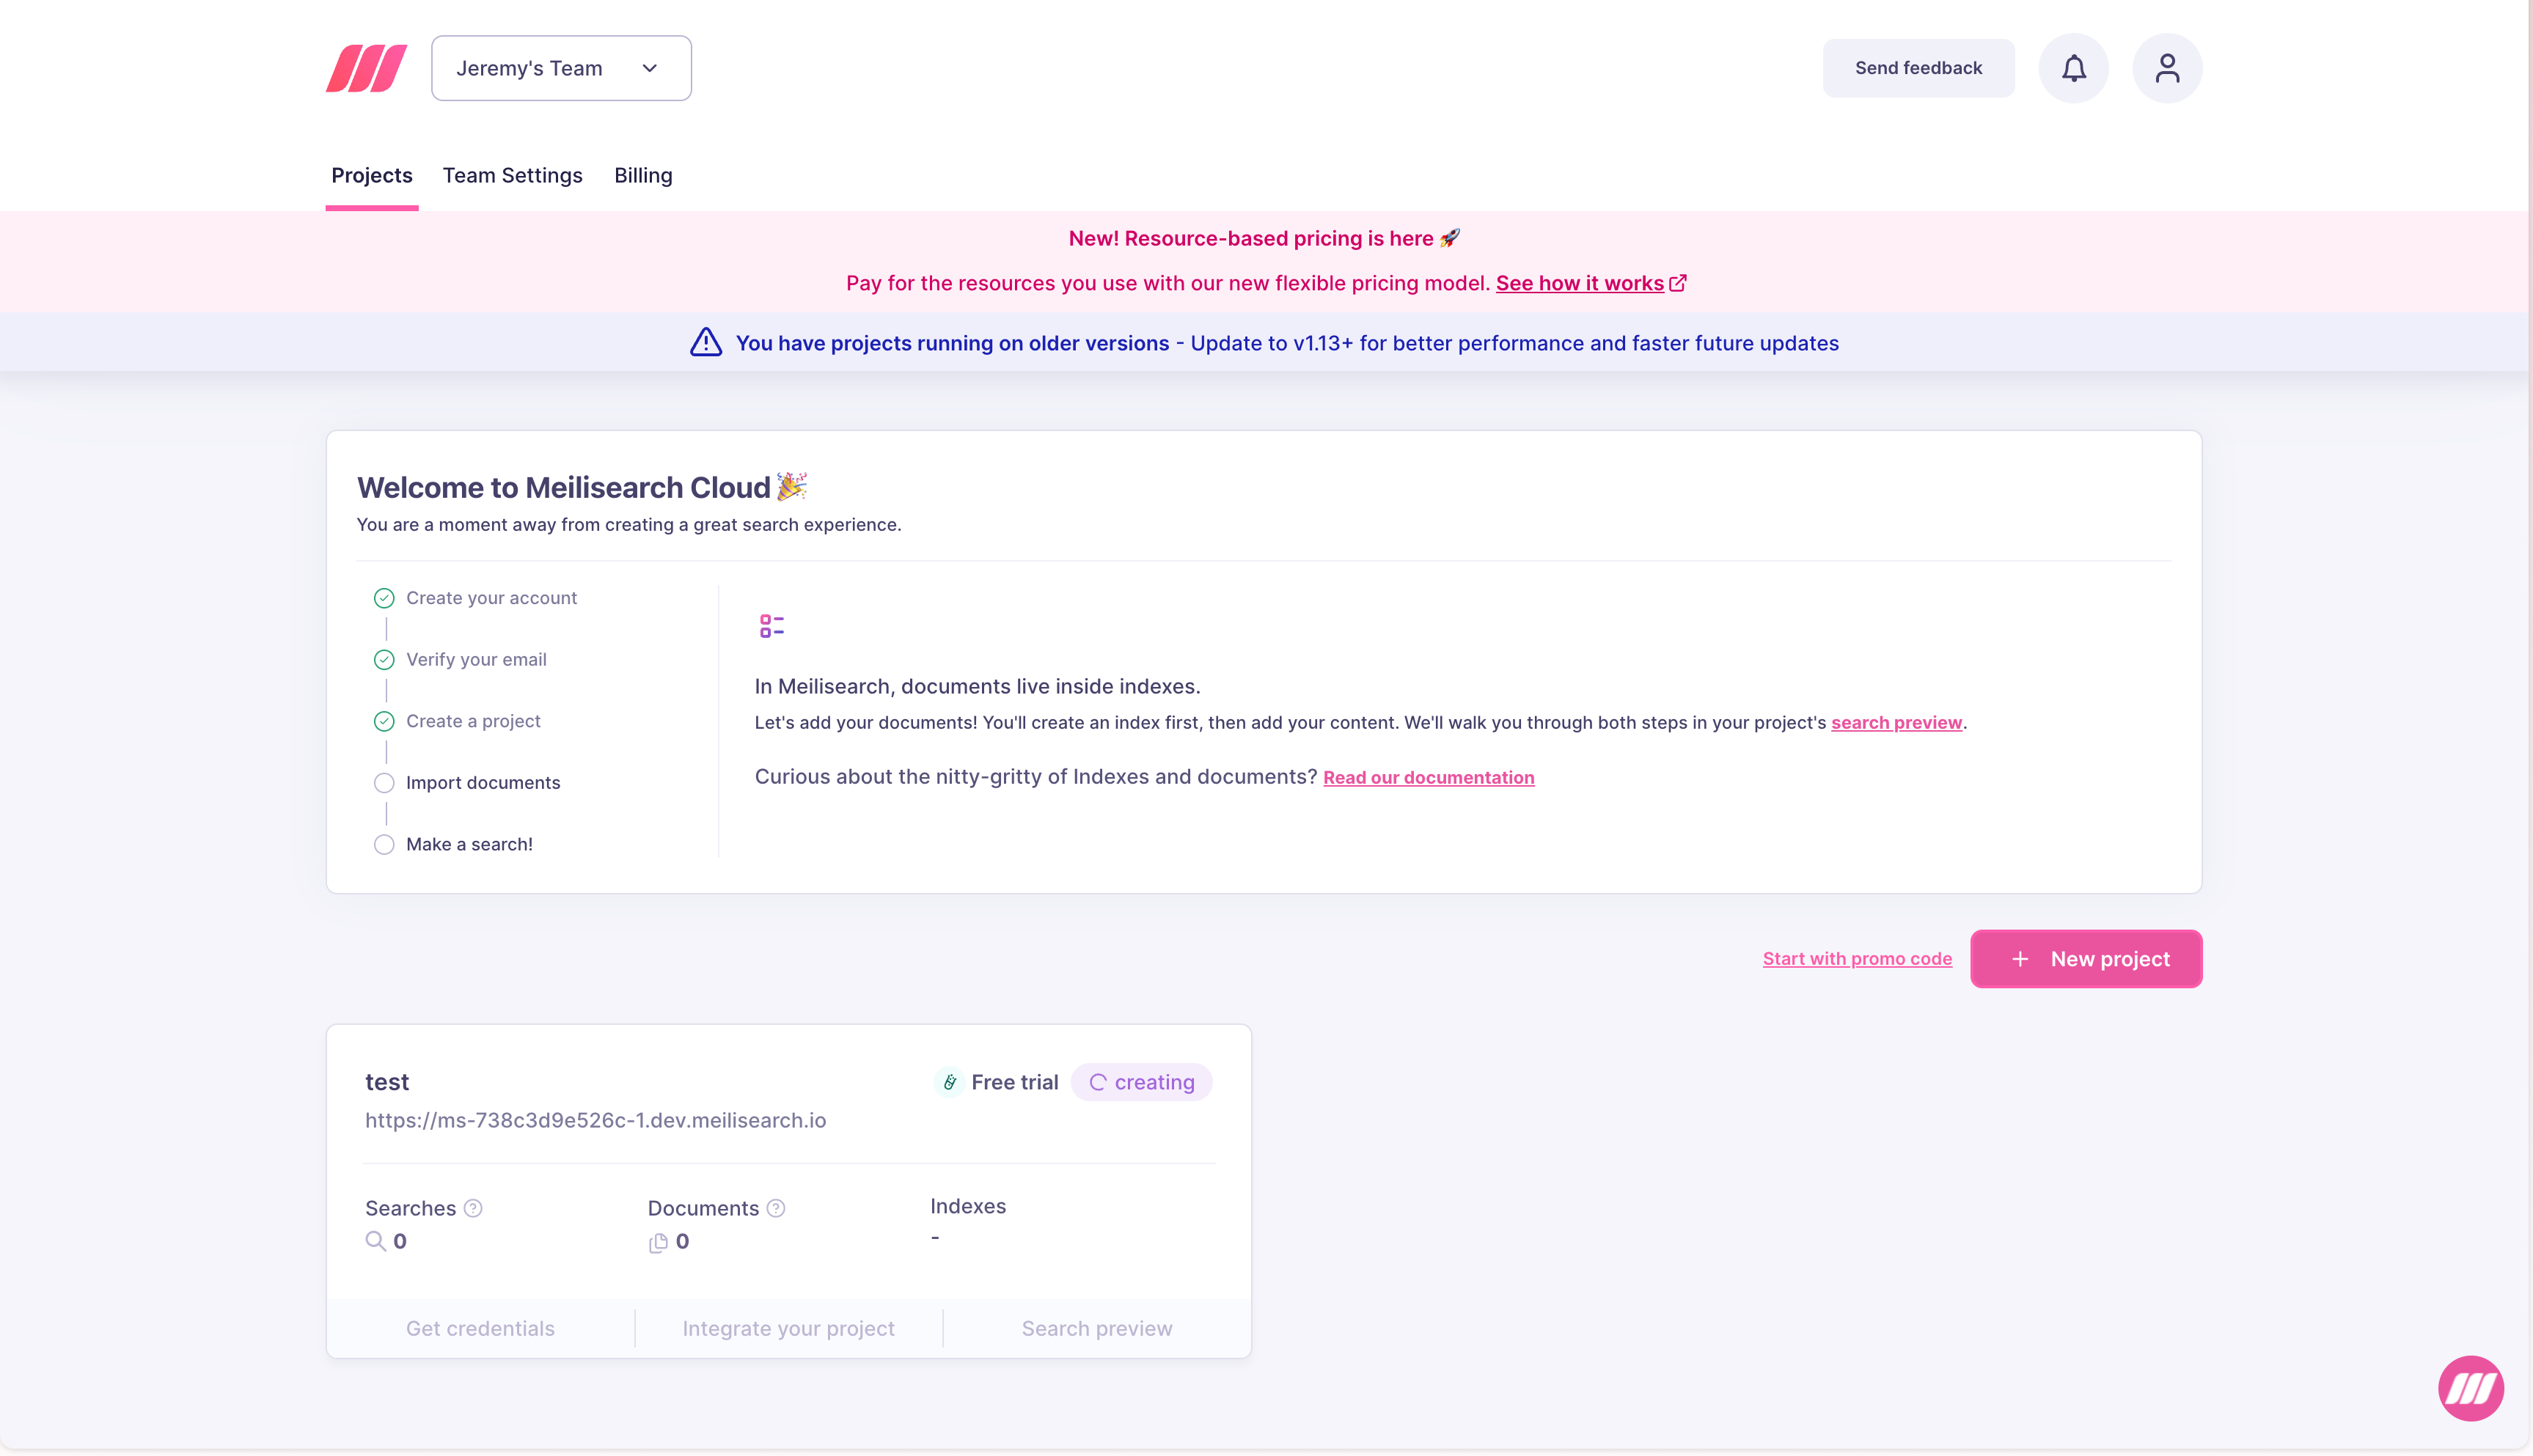
Next steps
- Add documents using your project’s API URL and admin key
- Manage resources to scale as your data grows
- Invite team members to collaborate on the project